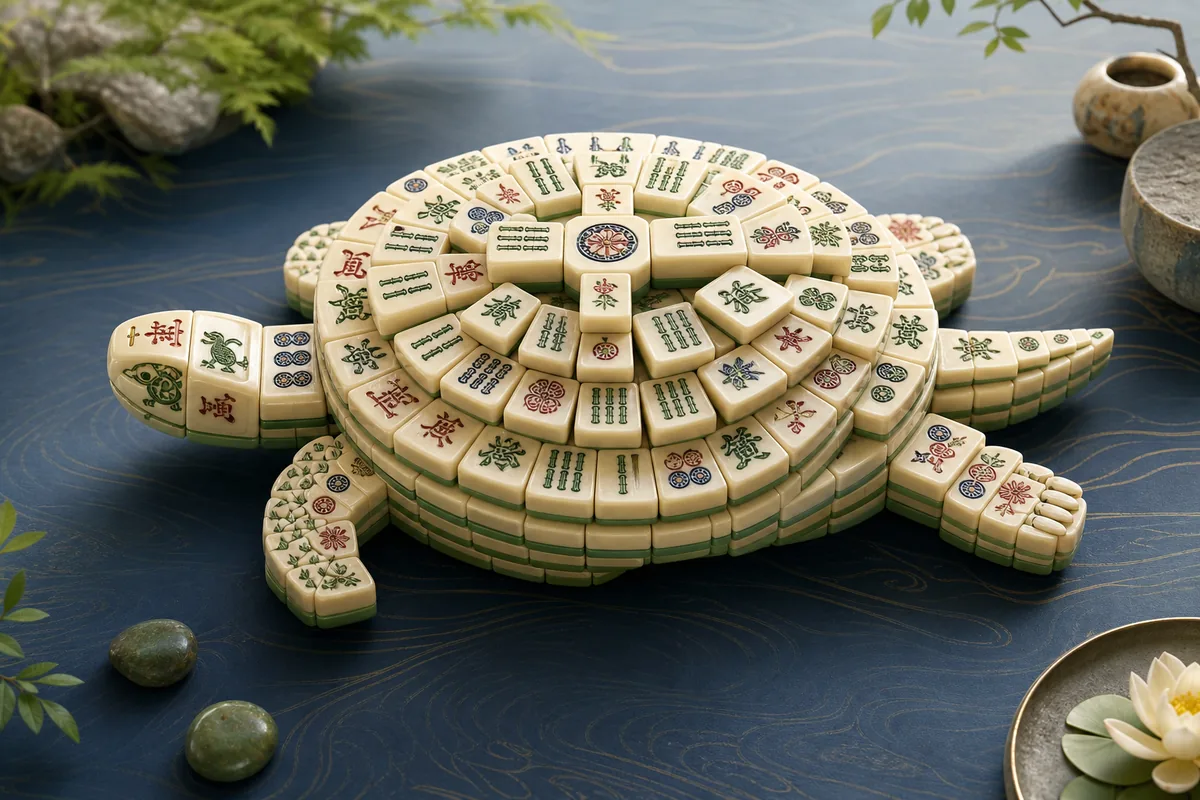
Map the Turtle before moving
Most versions place a single tile at the highest point, with stepped layers beneath it. The head and tail project from opposite ends, and side pieces or “feet” extend beyond the body. Exact coordinates vary between games, but the strategic roles remain recognisable: a projecting tile may unlock an entire row, while the top tile releases central depth.
Do not assume every edge piece is free. Some side tiles are partially covered, and a row-end tile may have an open side but still sit under an overlap. Check both accessibility conditions rather than trusting the silhouette.
Balance the centre and the wings
Opening the top is attractive because it reveals new faces, yet clearing only the centre can leave long base rows sealed from both ends. Conversely, stripping the wings while ignoring height can expose many low tiles that remain covered. Alternate between these regions whenever legal pairs allow it.
A valuable pair often includes one central tile and one projecting tile. It reduces height while opening lateral access. When choosing among four copies, preserve the face that can later connect two difficult regions rather than consuming both easy outside copies.
Recognise the dangerous late board
The final layers may look almost flat but still contain pairs stacked directly above one another. Watch for duplicated symbols revealed in sequence. If two copies must pair together but one covers the other, you need alternative copies elsewhere before that stack can be cleared.
Use undo to revisit the point where the layout lost flexibility, not simply the final move. A Turtle rewards early planning because its widest and tallest constraints interact. A steady whole-board scan remains more reliable than chasing whichever pair appears first.
When replaying the same deal, compare the number of free faces after the first ten removals. A line that maintains several distinct matches generally offers more resilience than one that produces a narrow chain of forced moves.
Do not forget the detached side pieces
Many Turtle boards place a single tile at the far left and another at the far right. Each may block the end of an entire row, so matching one of them can release more tiles than removing a pair from the central surface. Check their faces at the start and keep track of any visible partners before those partners are consumed elsewhere.
The head and tail create similar one-direction locks. When both ends offer moves, favour the pair that opens a longer chain, but make sure the symbol left behind still has a reachable mate. Treating these narrow extensions as access keys makes the broad body of the Turtle easier to manage.
Applied analysis
Read the five pressure zones
Divide the outline into the high centre, head, tail, left wing, and right wing. After each pair, ask which zone gained access and which remained dependent on a single end tile. If three consecutive moves help only the centre, deliberately search the outer zones before continuing. This prevents the visually satisfying mistake of flattening the shell while its longest rows stay sealed. The exact geometry varies, but the five-zone model works across most Turtle interpretations because it tracks the same mixture of vertical coverage and lateral locks.
Quick answers
Questions players ask
Is every Turtle layout identical?
No. Games may shift a few positions, but the raised body, broad base, and projecting ends create similar strategic pressures.
Which area should I clear first?
Usually combine progress on the top stack with progress at long-row ends; committing to only one region can create a lock.